
QuickBooks Integration
How to Integrate with QuickBooks
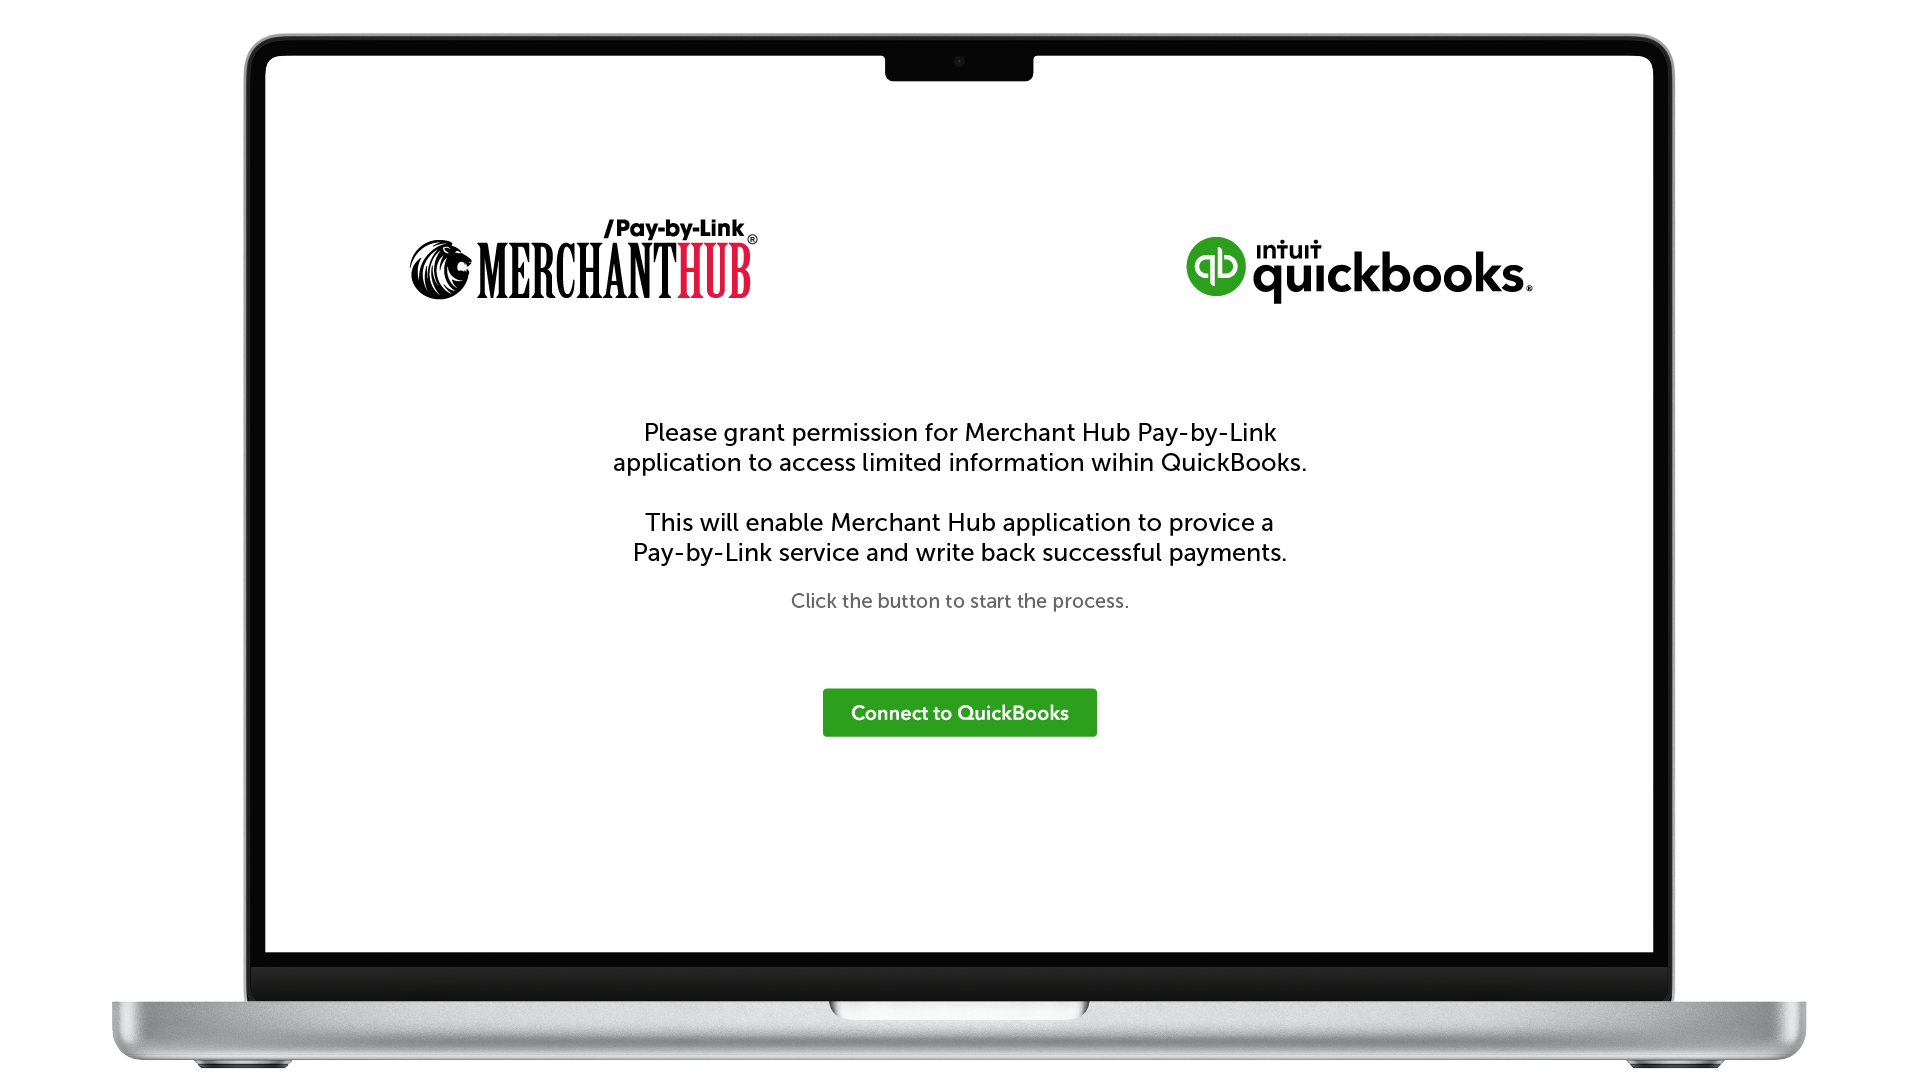
Initially we will send you a link that will enable you to grant us permission. Simply click the "Connect to QuickBooks" button to start the connection process.
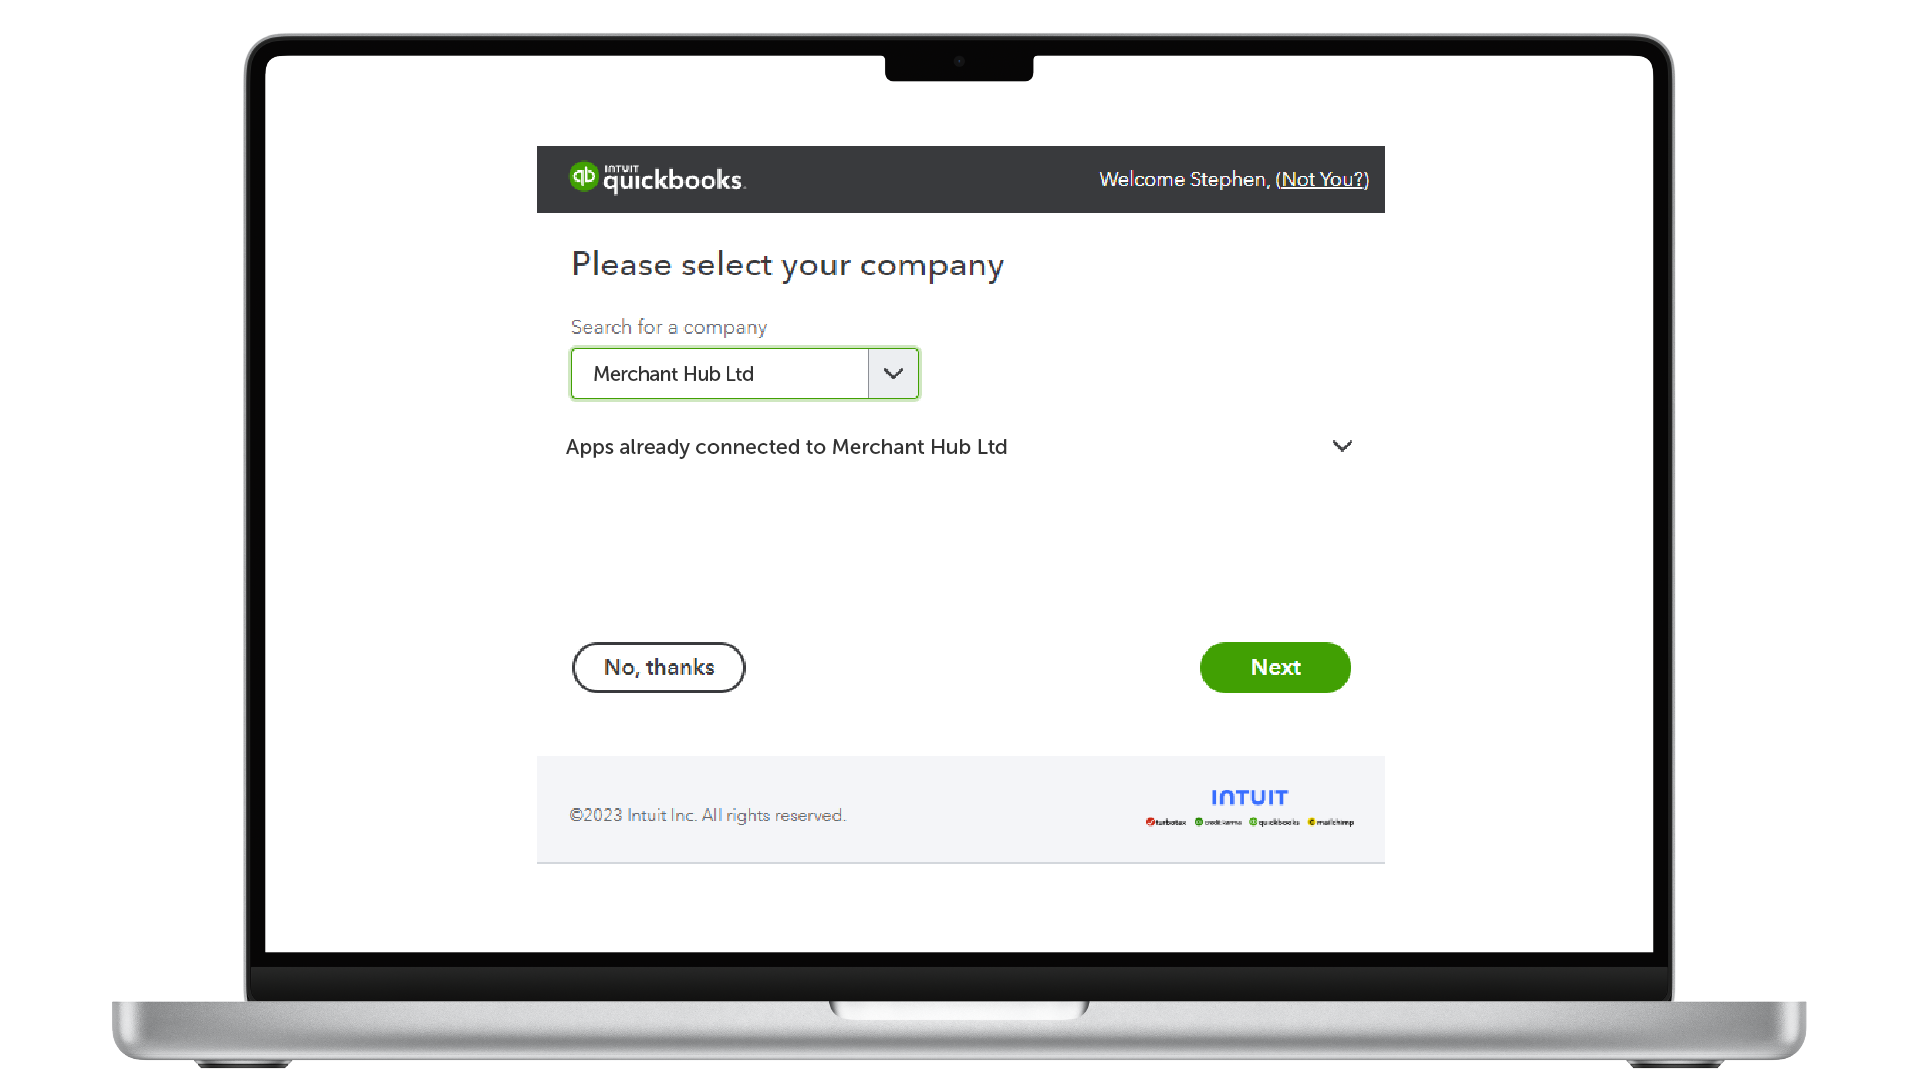
If you are not currently logged into QuickBooks, you will be asked to log in. Also, if you have multiple companies attached to your user account, you will be asked to select the company that you wish to connect.
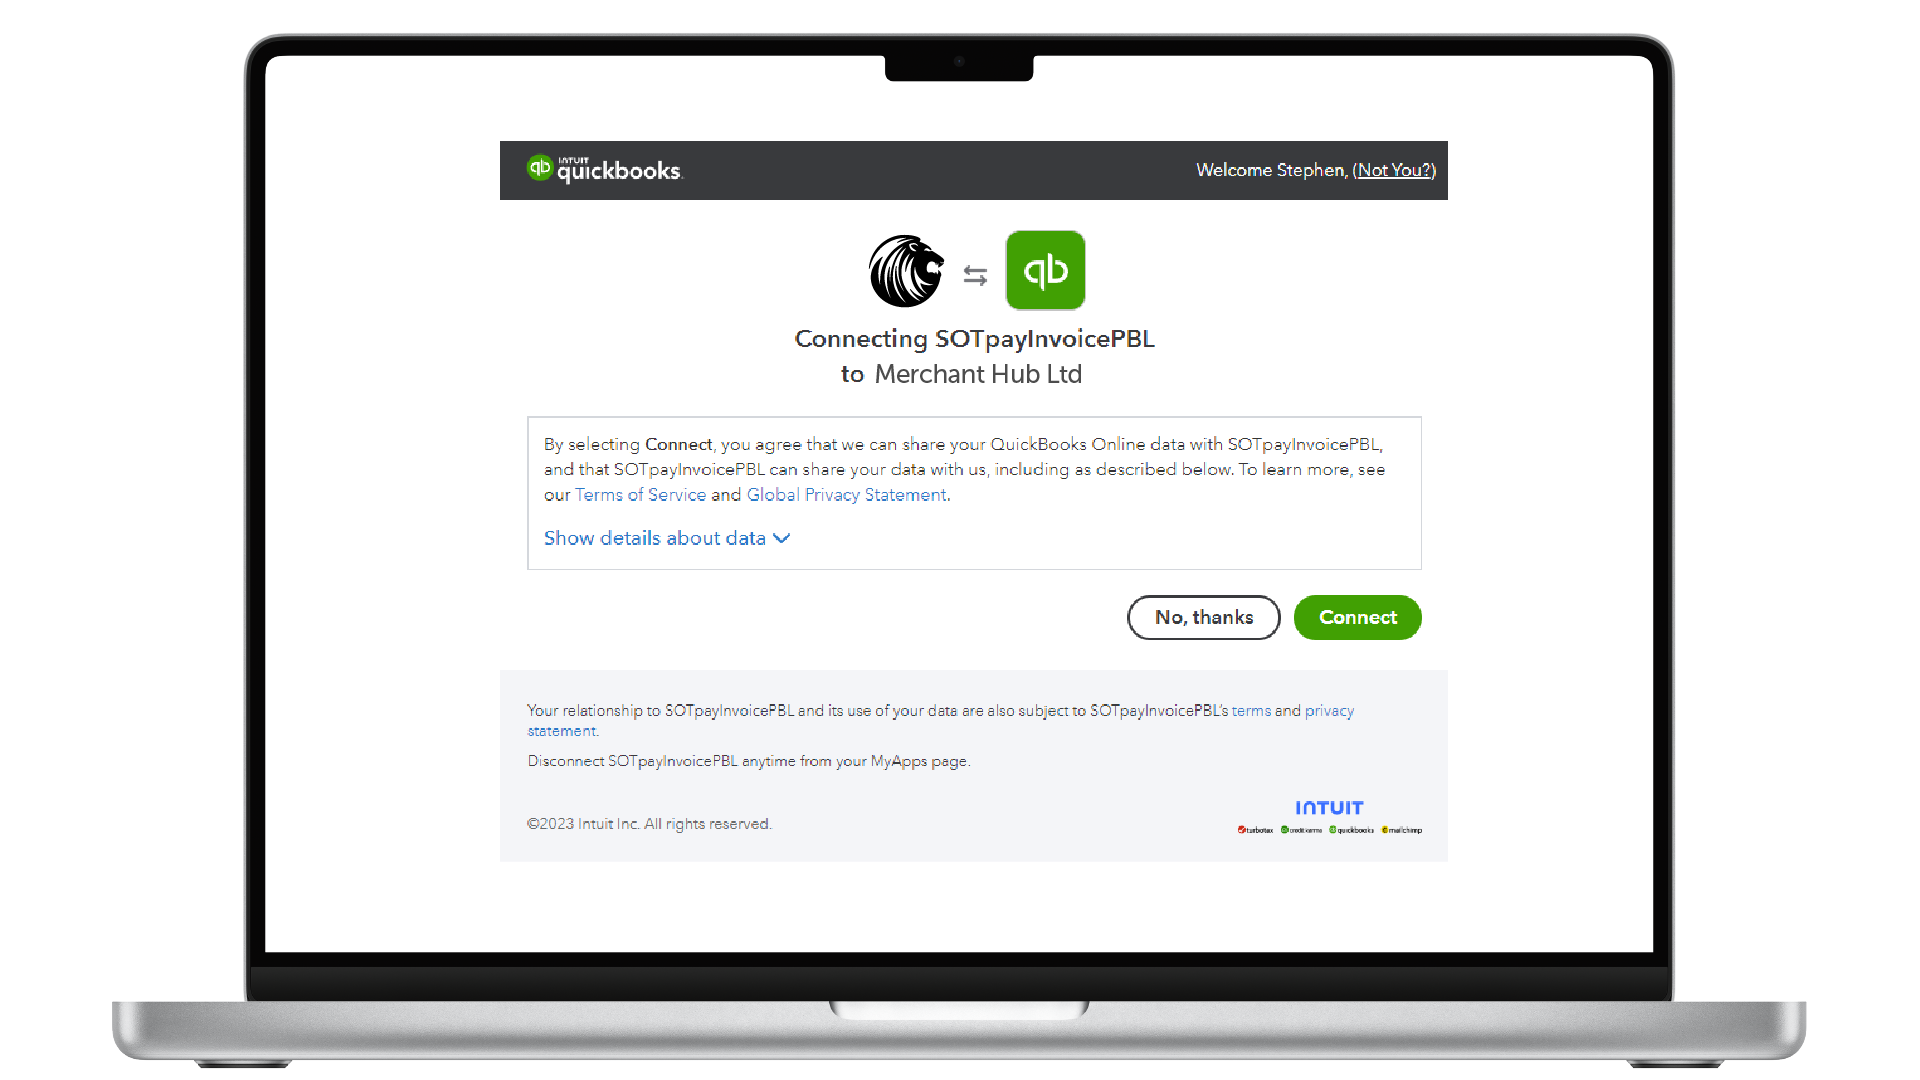
Once you are happy with the connection request, connect our app to your QuickBooks.
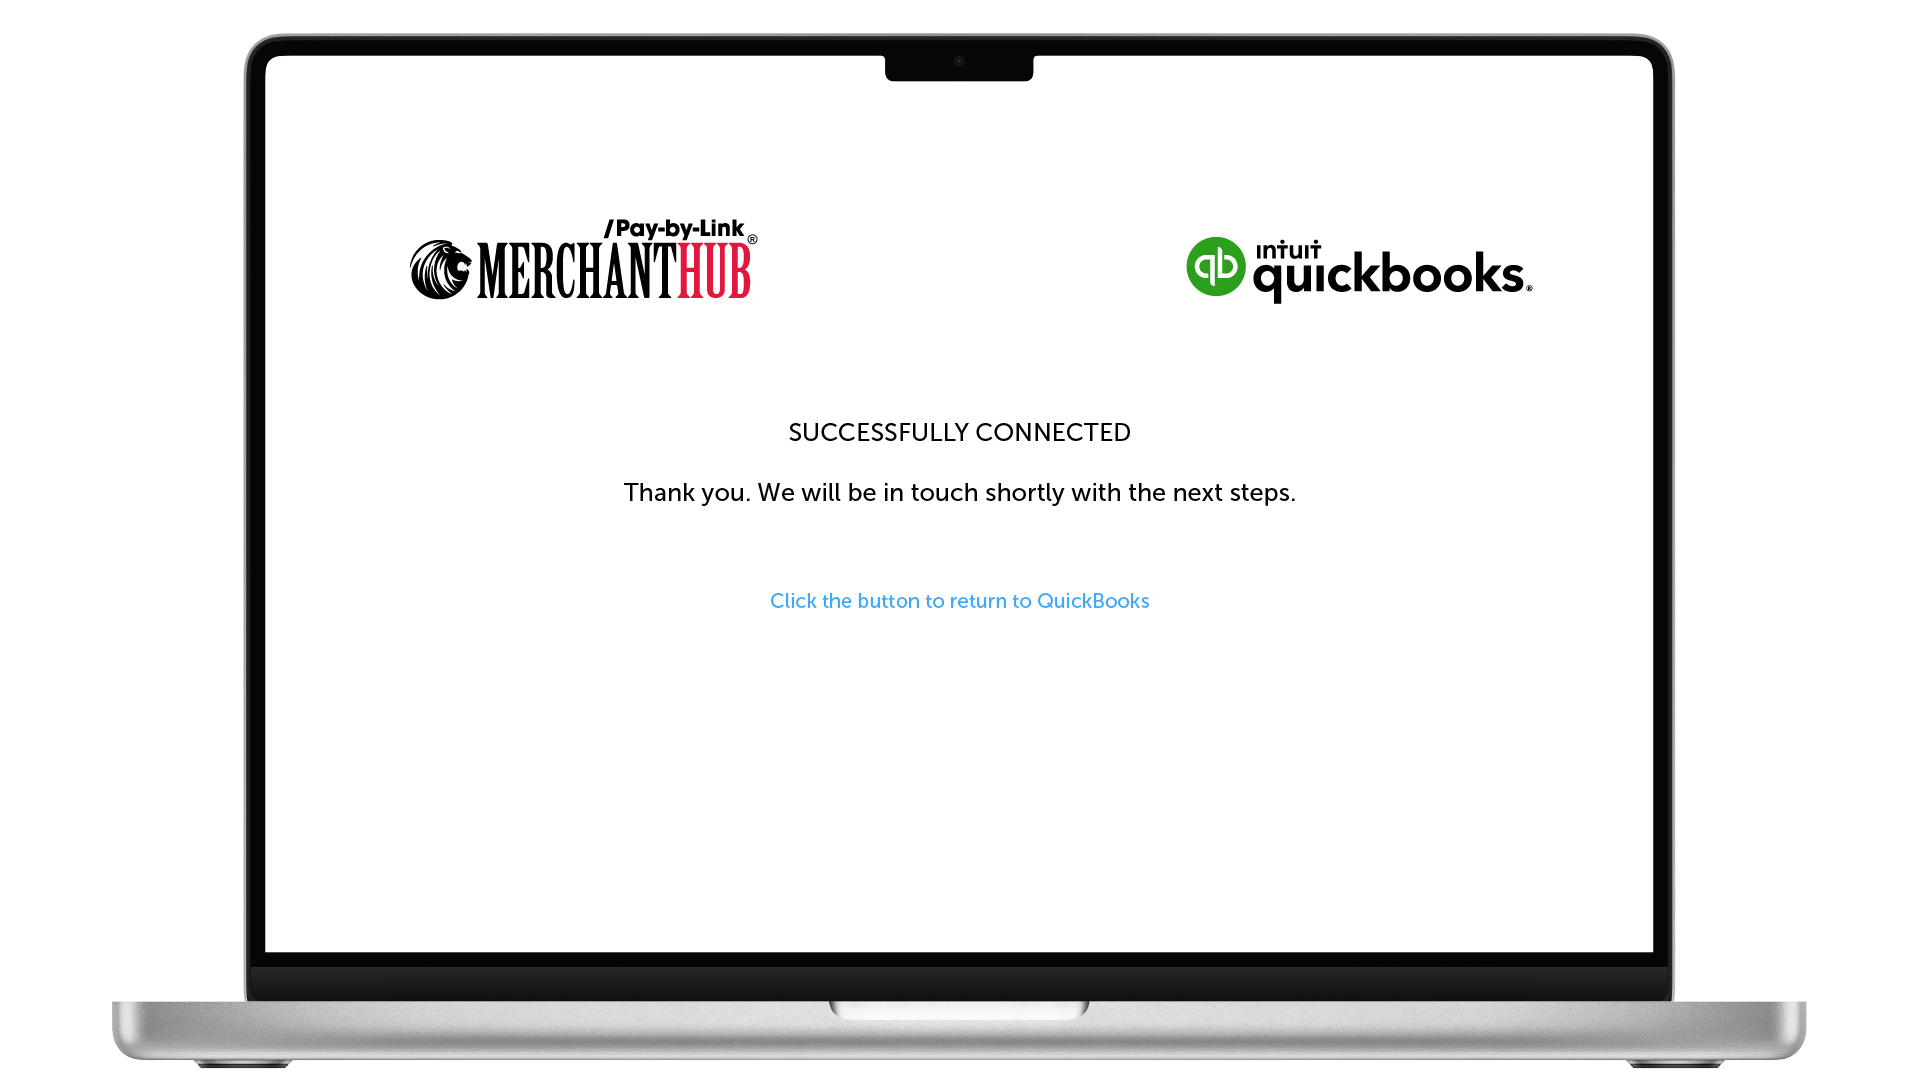
If everything goes through as expected, we should now have the required information to continue the rest of the setup process.
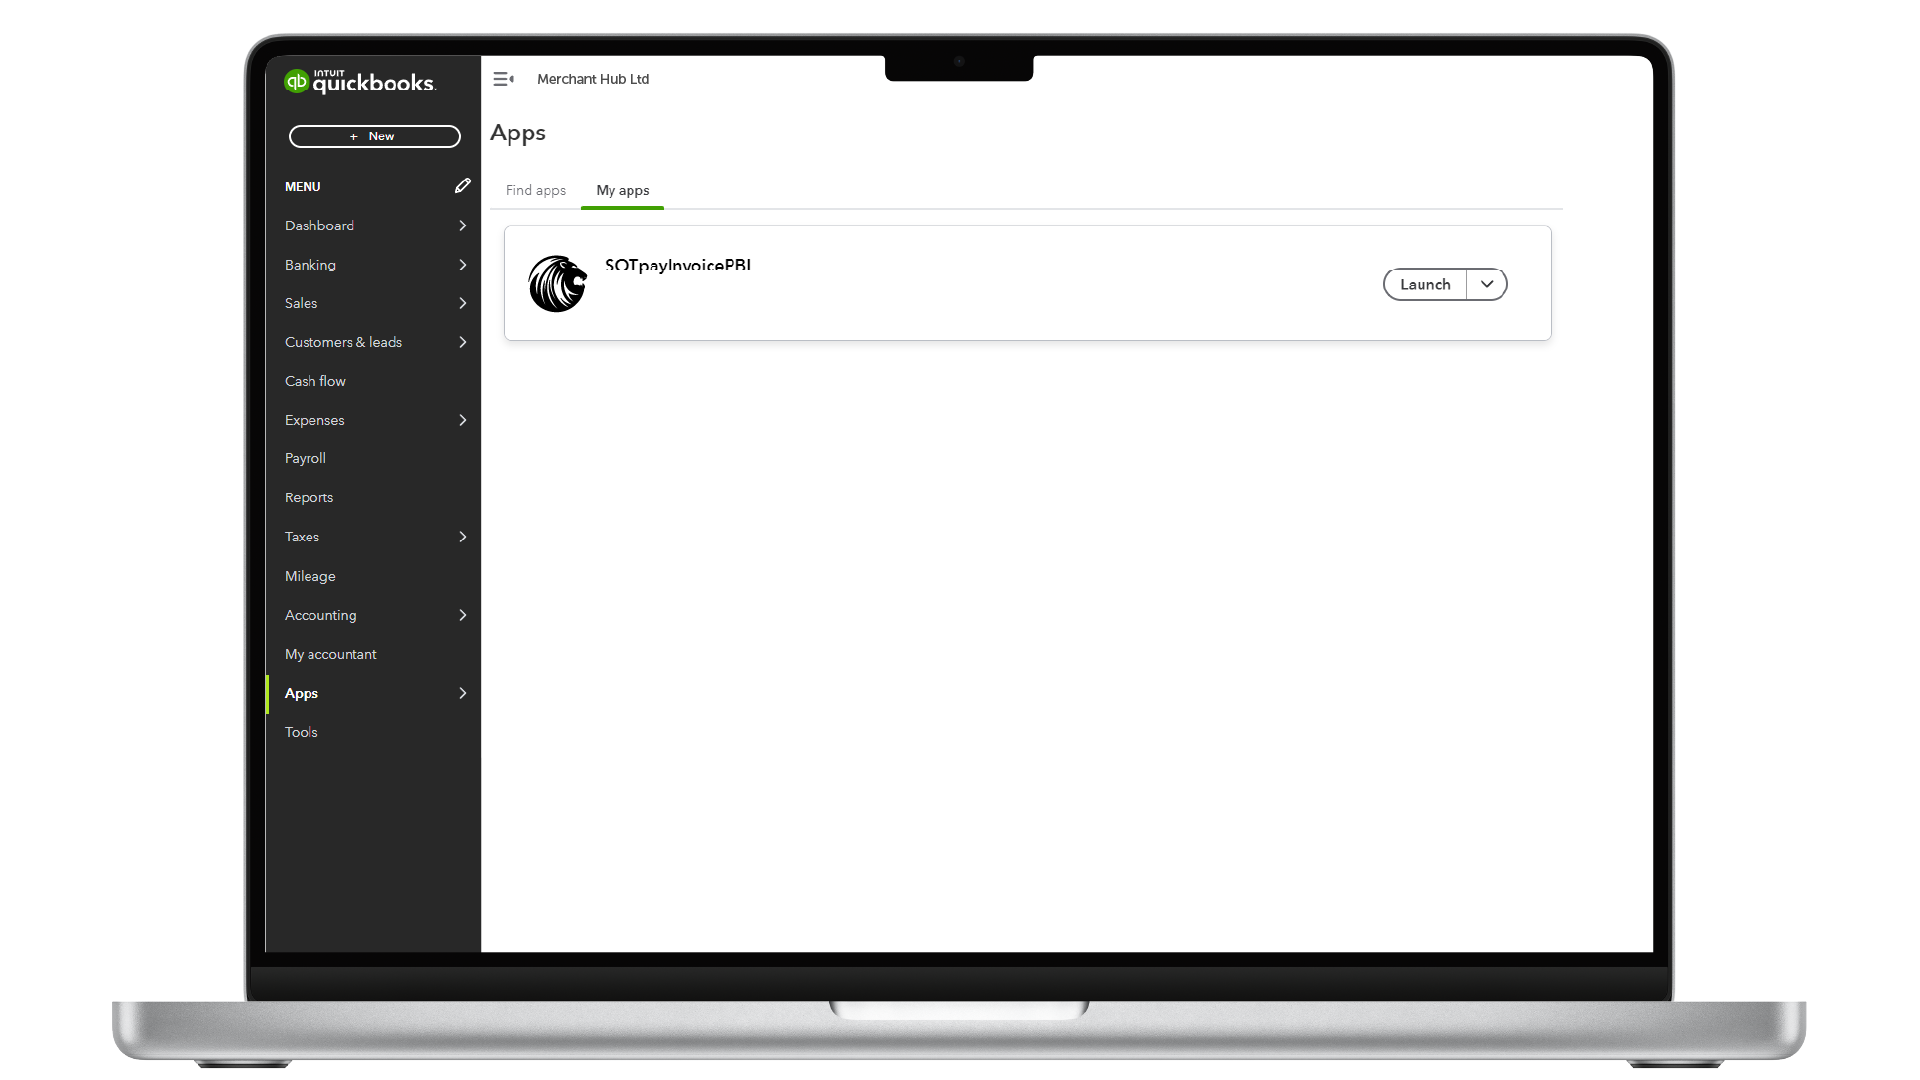
You should now see our app within QuickBooks. Select Apps from the left-hand menu, then click on the My Apps tab. Here you have the option to Launch or Disconnect the App. Launching the app is not required as it runs in the background.
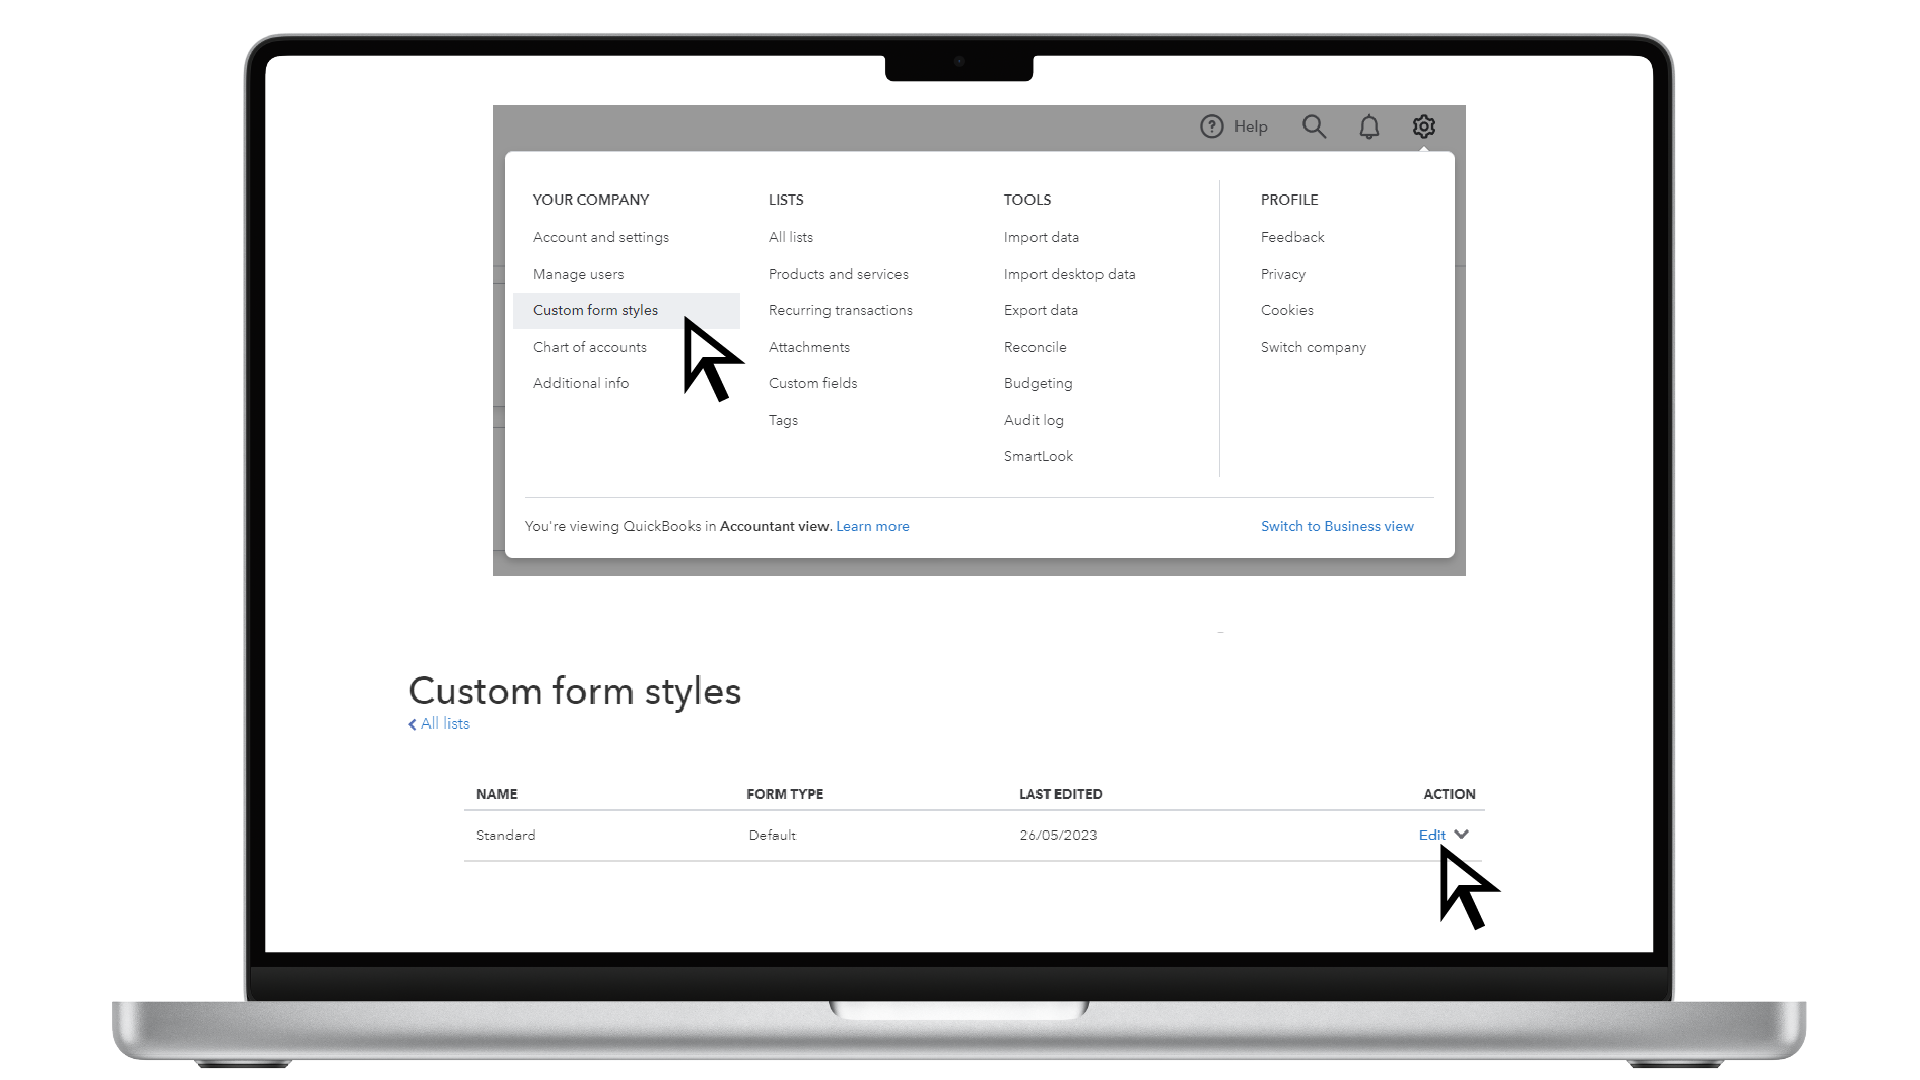
The next step is to insert a custom URL on your invoices that will trigger our Pay-By-Link service. Click the Gear Icon at the top of the screen, then select Custom form styles. On the "Custom form styles" page, select Edit against the existing style you wish to work with. You also have the option to create a new style if required.
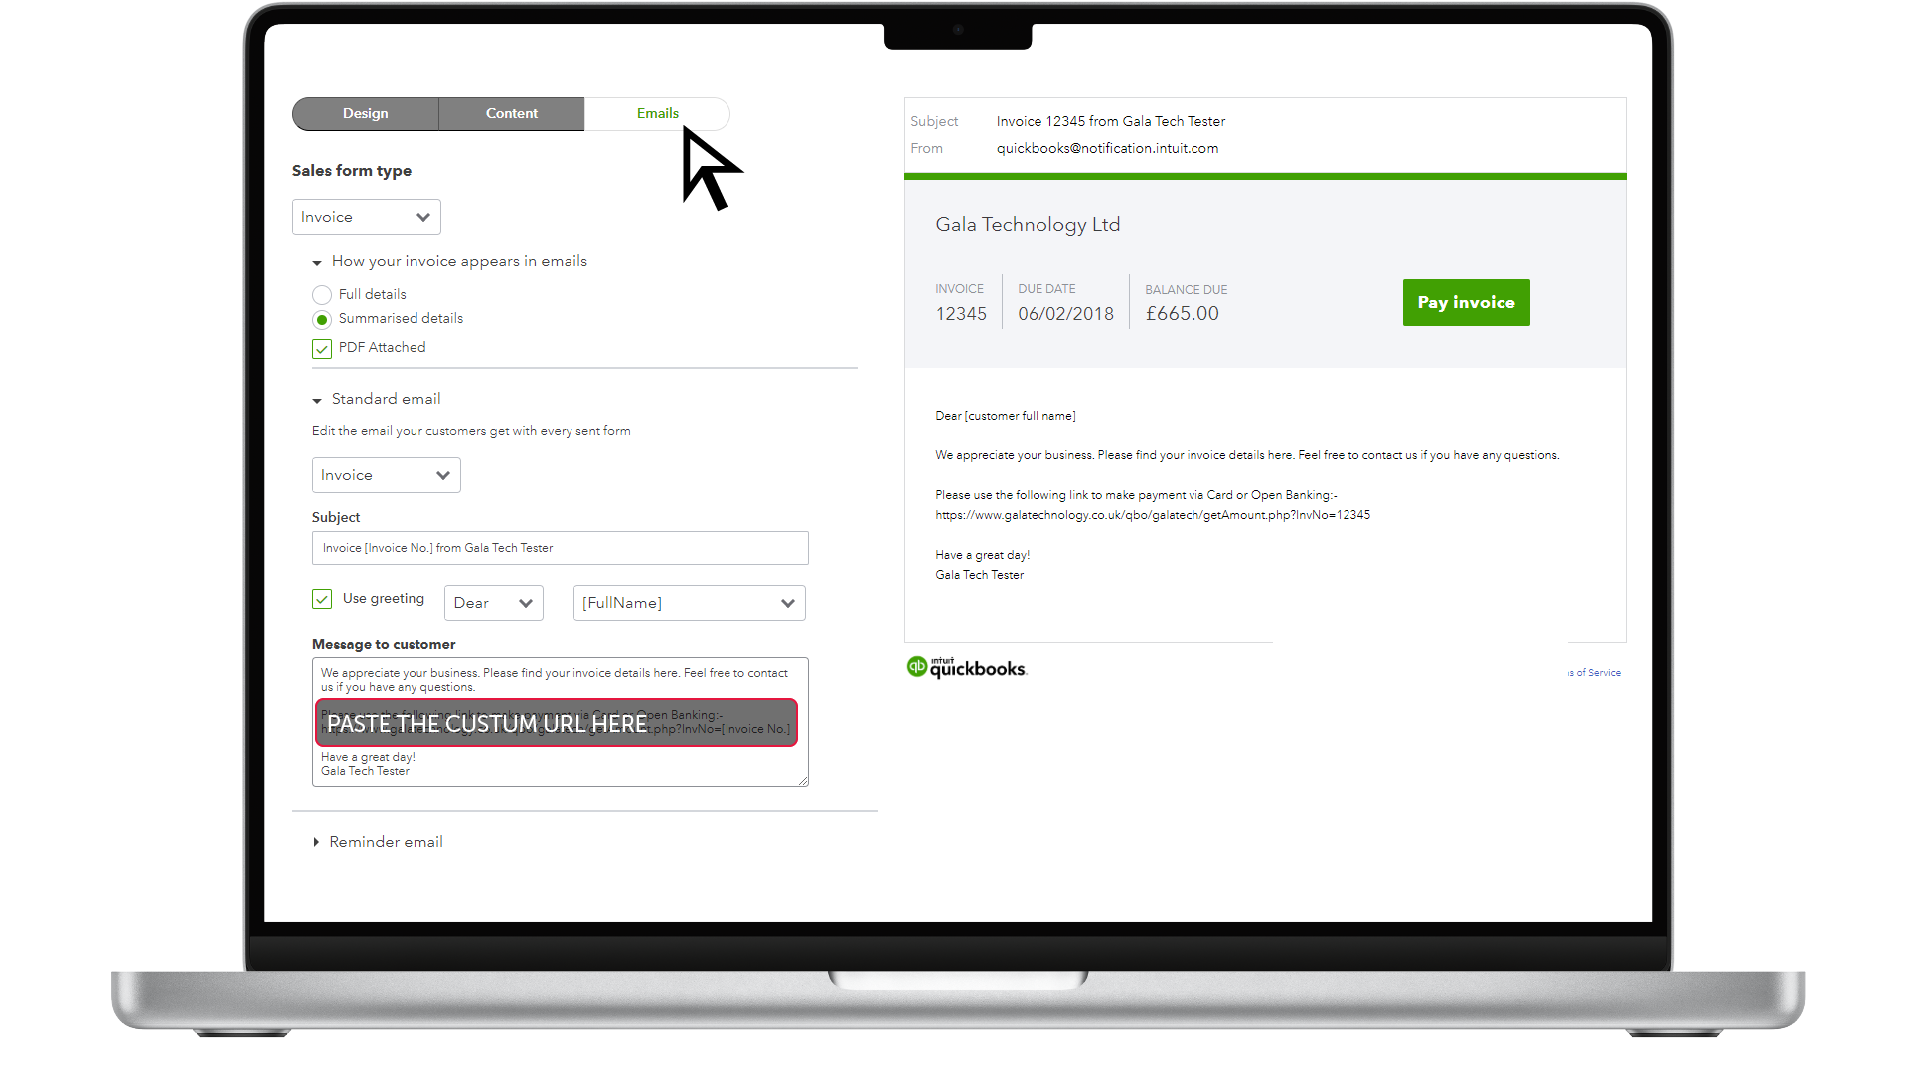
Firstly, select Email from the top menu. Once selected, paste the custom URL that we provided to you into the Message to Customer section. When you are ready, click the Done button. Your invoice emails will now have the Merchant Hub Pay-By-Link Option enabled.
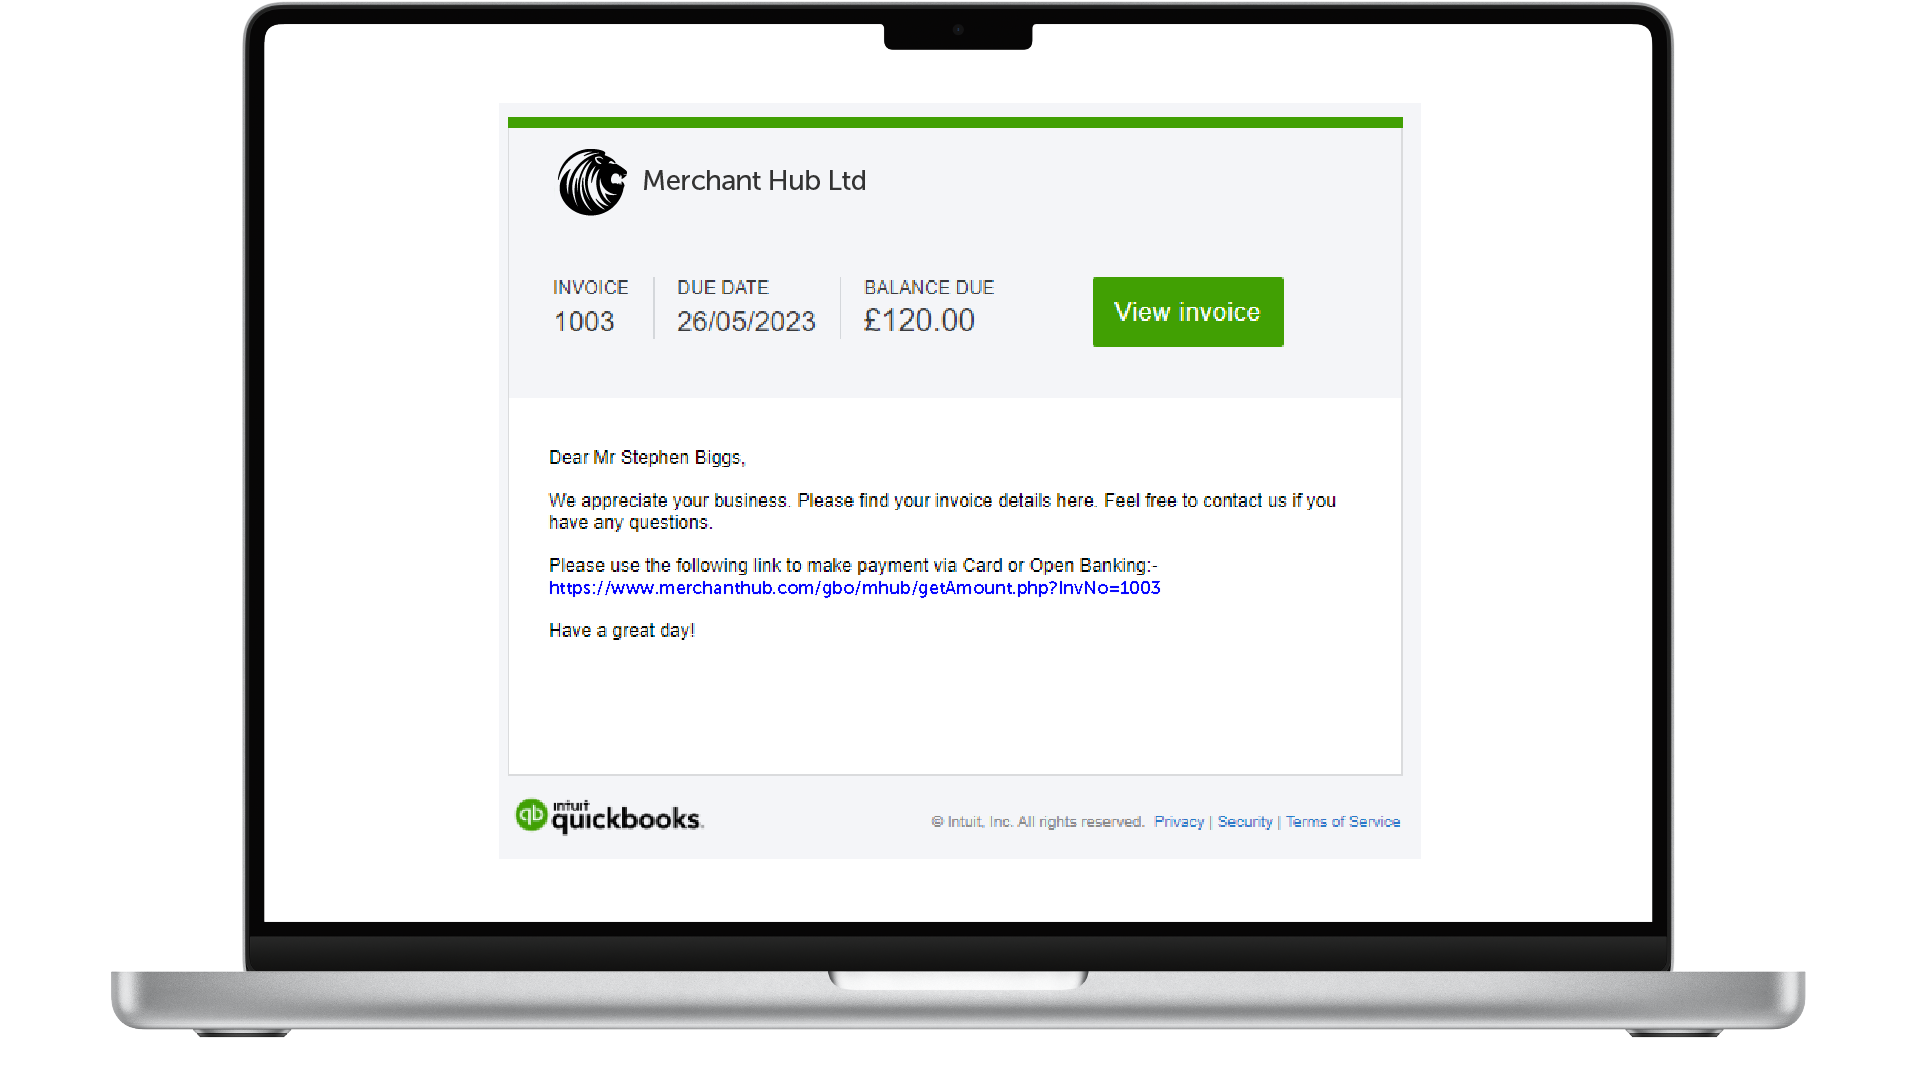
This is an example of the invoice email sent from QuickBooks with the Merchant Hub Pay-By-Link.
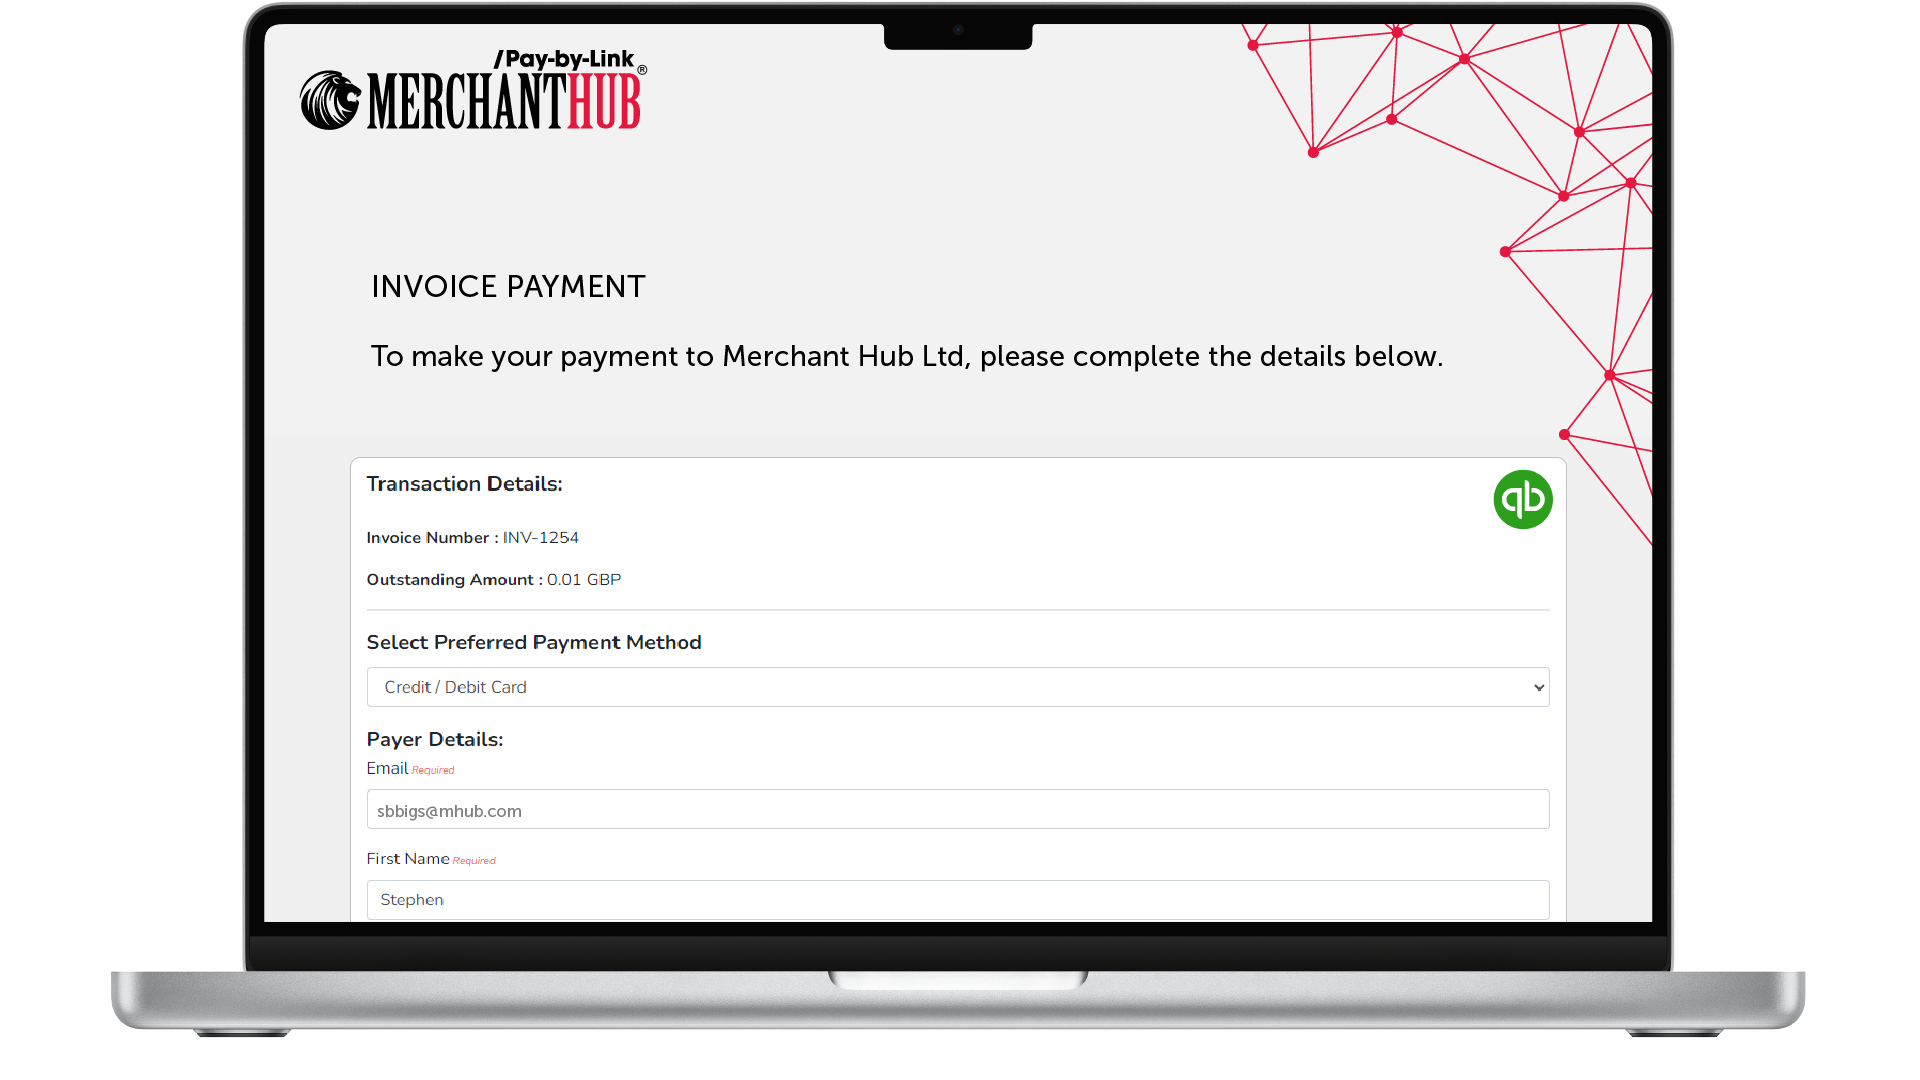
Clicking the link on the email will transfer the customer to the Merchant Hub Pay-By-Link platform. Depending on your configuration, the customer can pay by Card or Instant Bank Transfer.

Card transactions require more payer details than Instant Bank transfers. Either way, the details stored in QuickBooks for the customer will automatically be transferred to save time and reduce typing errors. The payer will still have the option to amend the retrieved details.
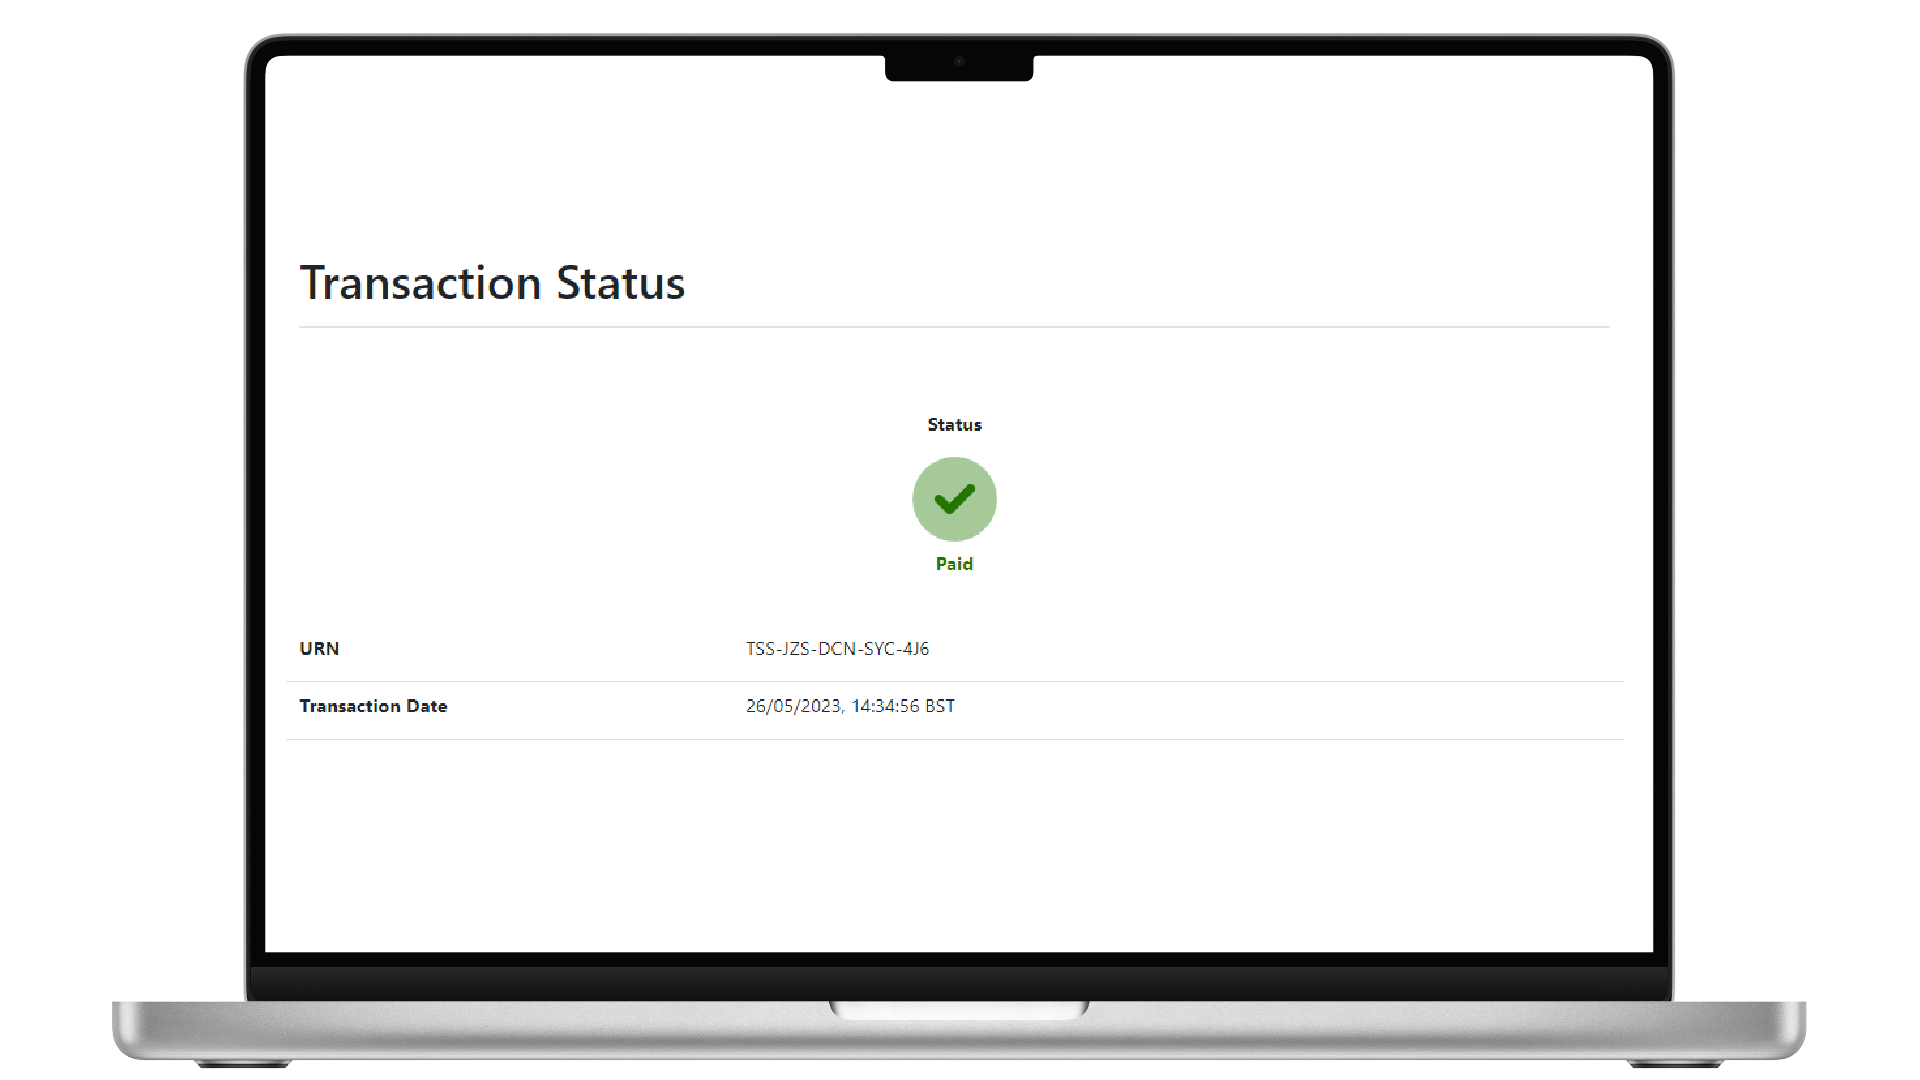
Once complete, the customer will be presented with the outcome of the transaction.
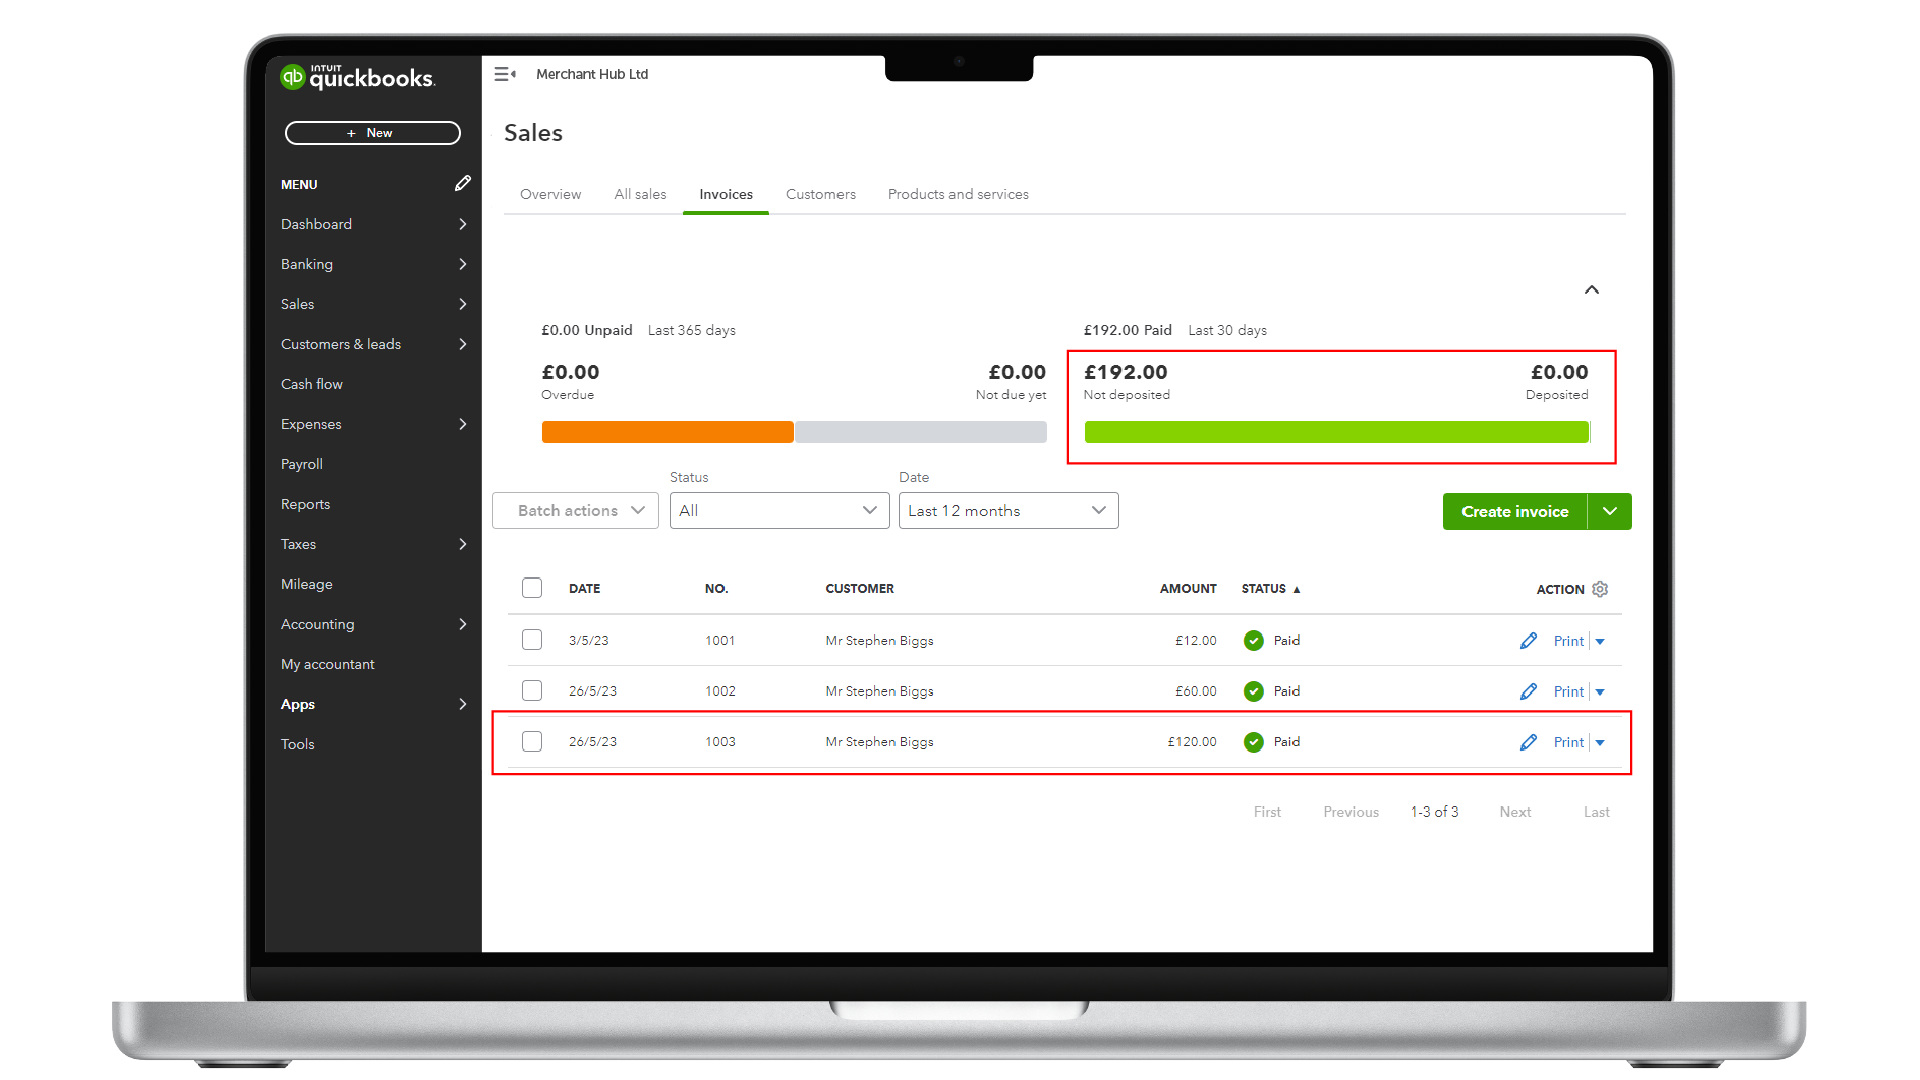
For Paid transactions, we will write back to QuickBooks updating the Invoice and the "Not deposited" account.
Any Questions?
Please get in touch with our technical support at (0207) 952-2150 and our expert technical team will be happy to help you.